Re-import BOM message appears when creating Item No. (balloon)
When outputting an assembly as a part in the CAXA Draft, if you see a re-import message for the part list, the following causes may be considered:
- "Include this shape in BOM" of 3D Properties is not checked.
- It is set to "Treat as part" in the Assembly Properties
Explain the solution for each cause.
"Include this shape in BOM" of 3D Properties is not checked.
Change the settings to include each part in the assembly in the part list.
Procedures:
[1] Display the target assembly in 3D scene.
[2] Check "Include this shape in BOM" from each part/Assembly Properties.
[3] After changing the settings, please re-import the parts list if necessary.
It is set to "Treat as part" in the Assembly Properties
If there are parts in the assembly that do not expand to the BOM, you cannot create item numbers.
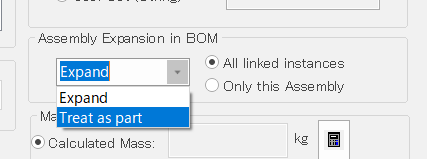
Please change to "Treat as part" of BOM setting and output the assembly to the part table as a part.
Procedures:
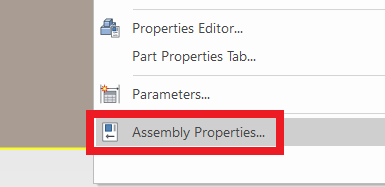
[1] Select the target assembly from the 3D scene browser.
[2] Right-click the assembly.
[3] Select "Assembly Properties".
[4] Select [Treat as part] from "Assembly Expansion in BOM".
Please refer to the video below.
CA-009
Related Articles
Create a part number (balloon) in a 2D diagram
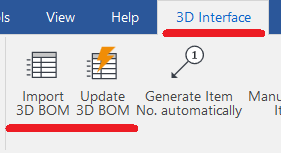
This section explains how to create item numbers in CAXA Draft what infomation gotted from 3D data. To create part numbers based on 3D information, you must first perform [Import 3D Parts List]. 3D and linked - IRONCAD User's Guide Use [Create Item ...Creating Quick Coordinate Dimensions
This section explains the Quick Coordinate Dimension feature. Procedure: [1] Click [Quick] under the [Coordinate Dimension] menu in the [Annotation] tab. [2] First, click the point to be defined as the origin (base point). [3] Click any point where ...Import 2D drawings as reference
Explain about "Import Refernce 2D" command. When creating a 3D shape from an imported reference diagram, you can use it for inspection by adapting 2D to an existing 3D shape. 〔1〕 Click "Import Reference 2D" on the Tools tab. [2] Select data. Then ...Grouping part numbers (balloons)
Item numbers (balloons) can be grouped. Procedures: [1] Create a item number with [Manual Generate item No.] on the [3D Interface] tab. [2] Select the Item Numbers you want to group on the BOM list. [3] Click on the item number created in [1] to ...Creating Staggered Dimension
This section explains how to create [Staggered Dimension]. When dimension lines and text become crowded, you can place coordinate dimensions using leader lines with bends to specify their positions clearly. There are two methods for creating stepped ...