Creating Hatching in Projected Views from 3D
This section explains how to apply custom hatching patterns to each part in a projected view created from 3D data in CAXA Draft.
Procedure:
[1] Click [Standard View], then move [Options] tab.
Set the [Hatch Settings] for each part or assembly.
Set the [Hatch Settings] for each part or assembly.

After selecting a hatch pattern for each part, be sure to click Apply.
[2] Create [Section View] and confirm Hatching.
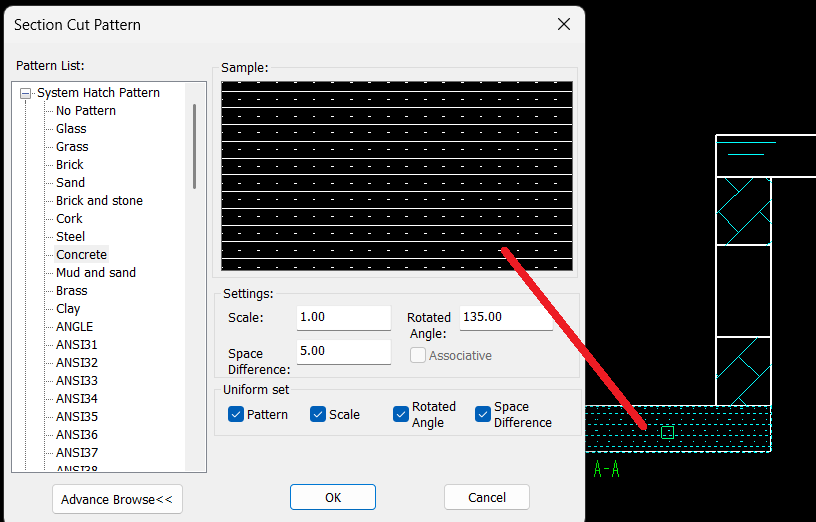
In case of you change pattern
[1] Click [Edit Hatch] in the [3D Interface] tab.
[2] Select hatching from the drawing. ※Multi selection enable
Then right-click.

[3] Change pattern and click [OK]
Please refer to the video below.
IC-080
Related Articles
Create Hatching in a Projected View
This section explains how to create manual Hatching in a projected view that is linked to a 3D drawing, independent of Section View. Procedure: [1] Right-click on the projected view and select [View Edit] or [View Edit In-place] to enter the ...Applying 3D Colors to Projected Views
This section explains how to reflect 3D part colors in projected views. There are three display modes for projected views. Among them, two modes allow the 3D color information to be reflected: [Quick View] mode (left image above) [Real Projection] ...Exporting Only Selected Views to DWG/DXF
This section explains how to export only the necessary projected views from a 2D drawing to DWG/DXF format, while excluding unwanted views. Procedure: [1] Right-click on the projected view you want to exclude, then select [Properties]. [2] Uncheck ...Creating Hole Coordinate Dimensions
This section explains how to create hole coordinate dimensions. [Hole] of coordinate dimensions display the X and Y coordinate values of holes in a projected view from an arbitrary reference point. You can also select points on shapes, not just ...Changing the Line Type of Specific Projected Parts
This section explains how to change the line type of specific parts or edges after projecting them into a 2D drawing. Procedure: [1] On the Drawing tab, in the Edit group, click Edit Shapes. [2] Select the type of element you wish to modify: Select ...