Creating Hole Coordinate Dimensions
This section explains how to create hole coordinate dimensions.
[Hole] of coordinate dimensions display the X and Y coordinate values of holes in a projected view from an arbitrary reference point.
You can also select points on shapes, not just holes.
Procedure:
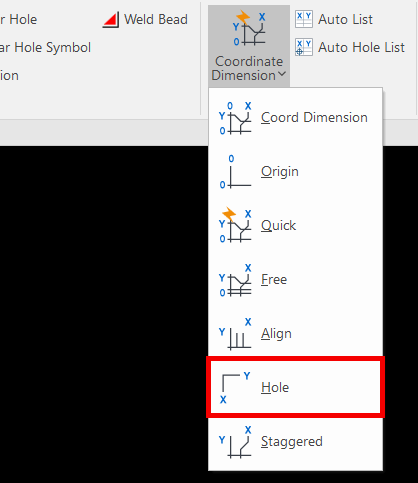
[1] Click [Hole] in the [Coordinate Dimension] of [Annotation] tab.

[2] Left-click in the drawing to assign Origin point (Base Point).

The clicked position in the drawing becomes the reference point. You can select any point, regardless of whether it is on a shape.
[3] Left-click on holes or points on shapes in the projected view to display their coordinates.
You can continue selecting points to create multiple dimensions.

Be careful not to click empty areas of the drawing, as a hole coordinate dimension will still be created even if there is no actual geometry.
[4] Press the [Esc] key or [Enter] key on your keyboard to finish the command.
Please refer to the video below.
CA-036
Related Articles
Create dimensions with the "Hole Dimension" command
Explain how to create dimensions with the "Hole Dimension" on the "3D Interface" tab. The Hole Dimension command displays dimensions on holes projected onto CAXA Draft based on hole information created with 3D data. Examples of projections linked to ...Create Progressive Dimensions (Coordinate Dimension)
In CAXA Draft, progressive dimension is referred to as [Coordinate Dimension]. To create dimensions based on any arbitrary reference point in the drawing, use [Align] in the [Coordinate Dimensions]. When you select [Align], the instance menu will ...Creating Quick Coordinate Dimensions
This section explains the Quick Coordinate Dimension feature. Procedure: [1] Click [Quick] under the [Coordinate Dimension] menu in the [Annotation] tab. [2] First, click the point to be defined as the origin (base point). [3] Click any point where ...Creating Free Coordinate Dimensions
This section explains how to create free coordinate dimensions. Define the starting point and fill in the coordinate dimensions while selecting the X and Y coordinates. You define a starting point and input coordinate dimension values by selecting X ...Creating a Bolt Hole Using [Custom Hole]
This section explains how to create a bolt hole using the [Custom Hole] feature found in the [Feature] tab. Procedure: [1] Go to the [Feature] tab and click [Custom Hole]. [2] Select the target part and click on the desired placement point. [3] In ...