Reflect 3D Custom Property Information in the Parts List
This section explains how to reflect 3D custom property information in the parts list in CAXA Draft.
[1] In the CAXA Draft Options, select [System] from the list on the left side.
Click [Set Matching Rule] on the right side.
[2] In the Matching Rules screen, double-click on an empty area.
[3] Enter the [Attribute] and [Match Name], then click [OK].
[4] Click [Save].
[5] Click [BOM] in the [Style Manager] under the [Annotation] tab.
Select the style you want to use and add a column for the name (Attribute name) entered as a custom property.
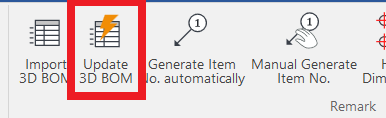
[6] If the parts list has already been created, click [Update 3D BOM].
[7] On the right side, where the target [Attribute] is shown, select the [Match Name] you entered in the [Set Match Rule] from the pulldown menu, and click [OK].
[8] The custom property information is now reflected in the parts list.
Related Articles
Setting a Custom Property Template
This section explains how to configure custom property templates for Parts, Assemblies, and Sheet Metal Parts. Once a template is defined, any blocks created from the catalog or assemblies that are generated will automatically include the specified ...Applying 3D Custom Properties to 2D Drawing Layers (Custom Property Mapping)
This section explains how to link custom property information set in 3D to the [Styles and Layers] in 2D drawings, allowing you to change colors or linetypes of specific elements in the drawing. By using the Custom Property Mapping feature in 2D ...Reflect the Total Weight from the Parts List to the Title Block
Explain how to reflect the total weight of the part list in the title field. This section explains how to reflect the total weight from the parts list into the title block. The parts list has a feature for setting the total weight. Using this ...Project some parts into 2D with imaginary lines
It changes line type of some In the 2D assembly drawing, in addition to the main design data, it want to may be expressed in line types (imagination lines) other than solid lines. Using the 3D Configuration function, it can project to be divided into ...Set Parts as Active
When setting a part as active means currently modeled part only editable. This prevents accidental modifications to other parts. How to: Select the part you want to activate, then right-click and choose [Set as active] from the context menu. The name ...