Create movements along the cam with followers/cam restraint
Explain how to create animations where followers work along the rotation cam.
Procedures
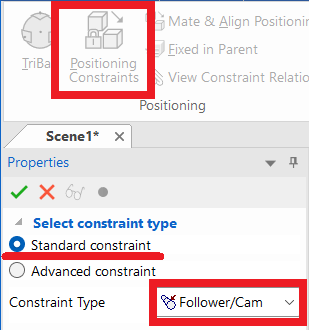
[1] Click [Positioning Constraints] from [Positioning] group on the [Tools] tab.
Then select [Followers/Cam] command.
Then select [Followers/Cam] command.

Be sure to create any cam-shape with a sketch in the cross-section.
If you create them to use [Fillet] command on the [Feature] tab, you will not be able to move followers/cam normally.
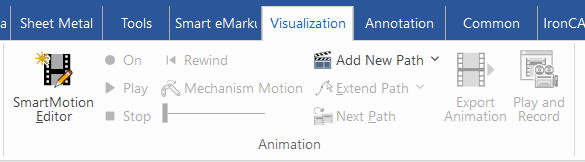
[2] Create an Animation with adding paths on the [Visualization] tab.
Set of followers/cams as close as possible.
If the setting site is held at a distance, the cam may move in the opposite direction.
Please refer to the video below.
※Ironcad 2023 and later
Ic-078
※Ironcad 2023 and later
Ic-078
*Ironcad 2022 or earlier
The IC-104
Related Articles
Create a Cam Belts
This section explains the basic operations of [Cam Belt] in the [Flex Shapes] catalog. Procedure: Expand [Cam Belt] in the Scene Browser. Change size You can change the size of the cam belt by moving the negative feature cylinder (H Cylinder) using ...Create a Cam Shape by Extruding
This section explains how to create a cam-shaped model using the Extrusion Wizard. Procedure: [1] Click [Extrude Wizard] in the Feature tab. [2] On the wizard screen, click [Finish] and complete the wizard. [3] Right-click on the sketch screen, then ...Create Motion in Mechanism Mode
This section explains how to operate in [Mechanism Mode]. You can manually move parts or assemblies to check mechanical motion. Key: Fix stationary parts using [Fixed in Parent]. Apply appropriate positional constraints to parts that rotate or slide. ...Alie cylindrical parts with concentric restraint
This section explains how to position cylindrical parts and cylindrical holes with different orientations using concentric alignment. Methods: Using TriBall to manually align parts concentrically → No constraint applied Using the [Concentric] ...Create cylinder link mechanism animation
First, you will set constraints in the link section of the cylinder. Thereby, you can operate the cylinder rod and operate the parts linked to the cylinder. [1] To operate the cylinder rod, make the rod and tip nut into one assembly, Separate them ...