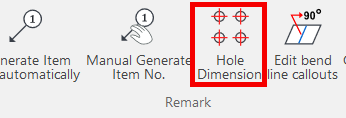
Create dimensions with the "Hole Dimension" command
Explain how to create dimensions with the "Hole Dimension" on the "3D Interface" tab.
The Hole Dimension command displays dimensions on holes projected onto CAXA Draft based on hole information created with 3D data.
Examples of projections linked to 3D data usually include (simple) holes, Thread holes, and Counterbored holes.
It is effective against these holes.
Simple hole
Thread hole
Counterbored hole
[1] Click "Hole Dimension" and select hole.
[2] Hole dimensions are displayed with the JIS symbol for hole diameter, thread size, depth, and counterbored size.
[3] If you want to change the symbol, double-click the created hole dimensions.
[3] If you want to change the symbol, double-click the created hole dimensions.
Please refer to the video below.
CA-038
About display settings
The dimensional display style of hole dimensions is set in the normal dimensional style.
Related Articles
Create dimensions in parallel for angled parts
Introduce how to create dimensions in parallel for an angled part. In case of "Base" command [1] Select "Base" from Smart Dimension pull-down menu on the "Annotation" tab. [2] Select a line from draw, then an endpoint (intersection) or line. By both ...Create Progressive Dimensions (Coordinate Dimension)
In CAXA Draft, progressive dimension is referred to as [Coordinate Dimension]. To create dimensions based on any arbitrary reference point in the drawing, use [Align] in the [Coordinate Dimensions]. When you select [Align], the instance menu will ...Create tape dimensions/curvature radius dimensions/large diameter circular dimensions/continuous angle dimensions
The CAXA Draft drawing explains how to create the following special dimensions: Pyramid/Pitch Curvature Dimension Big Arc Angle Continuous Please refer to the video below. CA-033Creating Hole Coordinate Dimensions
This section explains how to create hole coordinate dimensions. [Hole] of coordinate dimensions display the X and Y coordinate values of holes in a projected view from an arbitrary reference point. You can also select points on shapes, not just ...Converting a Cylindrical Hole to a Through Hole and Creating Dimensions
When creating hole dimensions in 2D drawings or CAXA Draft, holes made with [Cylindrical Hole] will display the plate thickness value—even if the hole is actually through. To display the hole as [THRU], as shown on the right side of the illustration, ...