Create a fan model
Fan-shaped models can be created in the Spin Wizard or Extrusion Wizard.
In case of Spin Wizard
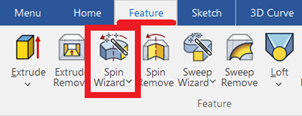
[1] Click "Spin Wizard" on the Feature tab.
[2] Select Plane Type, then draw sketch.

Create a sketch with the Y axis pointing upward. Then click "Finish"
(Spin with respect to the Y-axis)
(Spin with respect to the Y-axis)
[3] After creating the model, change the opening angle.
In the (yellow highlighted) state of IntelliShape,Right-click the handle for the rotation angle of the spin and select Edit Value.
Enter any angle and click OK.
In the (yellow highlighted) state of IntelliShape,Right-click the handle for the rotation angle of the spin and select Edit Value.
Enter any angle and click OK.
[4] Again, in the (yellow highlighted) state of IntelliShape, you can double-click on the dimensions to change the inner diameter, outer shape, and thickness.
Reference: Spin Wizard - IRONCAD User's Guide
In case of Extrusion Wizard
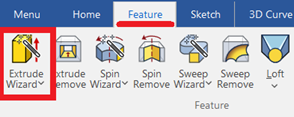
[1] Click "Extrude Wizard" on the Feature tab.
[2] Select Plane Type.
[3] Click "Center, Radius" on the Sketch tab. Draw the inner diameter and outer diameter
[4] Draw lines with "Two Point". And set dimensions with "SmartDimension" command.

[5] Delete unnecessary lines with "Trim" on the Sketch tab.

[5] Delete unnecessary lines with "Trim" on the Sketch tab.
[6] Double-click the constraint marks to enable corner vertical and horizontal restraint and so on.
Red is detained.
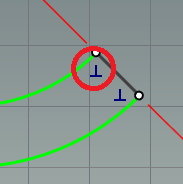
[5] When the inner and outer circles are concentric, the mark in the figure below is red.
[6] You can change the extrusion distance and change the thickness.
In the (yellow highlighted) state of IntelliShape, you can change the thickness by dragging the handle.
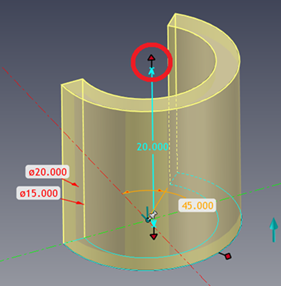
In the (yellow highlighted) state of IntelliShape, you can change the thickness by dragging the handle.
[8] Similarly,In the (yellow highlighted) state of IntelliShape, you can change the inner diameter, outer diameter, and opening angle.
You can double-click the dimensions and change them.

If you forgot to enter the dimensions, you can right-click on IntelliShape (highlighted in yellow) and add them in Edit Cross Section Shape.
Reference: Extrusion Wizard - IRONCAD User's Guide
Please refer to the video below.
IC-011
Related Articles
Create tape dimensions/curvature radius dimensions/large diameter circular dimensions/continuous angle dimensions
The CAXA Draft drawing explains how to create the following special dimensions: Pyramid/Pitch Curvature Dimension Big Arc Angle Continuous Please refer to the video below. CA-033Create continuous angle dimensions
This section explains how to create [Angle Continuous] dimensions. As shown in the figure below, you can create dimensions for a series of continuous angles in a single operation on a plan view or similar drawing. Please refer to the video below. ...Create a model with Sheet Metal Stock and Bend
This section explains the basic operations for creating a model using [Stock] and [Bend] from the sheet metal catalog. Procedure: [1] Drop [Stock] and select material. [2] Drop [Bend] into the stock part, then modify shape (angle, length or wide size ...Create chuck opening and closing behavior
Explain how to create a chuck movement to grab the workpiece. Even if the number of chuck points or more, if it is the same opening and closing operation, you can create a movement by copying one chuck in a circular array. Please refer to the ...Creating a Section View of Surface model
This section explains how to create a section view of a surface model by CAXA Draft. Surface models are displayed with a yellow icon in the Scene Browser. If you attempt to create a projection view, you can use [Section View] in the [3D Interface] ...