Create screws with conical table
This section explains how to create a tapered external thread.
IRONCAD is a CAD system that allows for efficient modeling using standard catalog items.
Tapered external threads can also be easily created by using the [Part Cone] item from the [Shapes] catalog.
Procedure:
[1] Drag & drop [Part Cone] from the [Shape] catalog.
[2] Resize part.
[3] Edit cross-section of Part Cone.
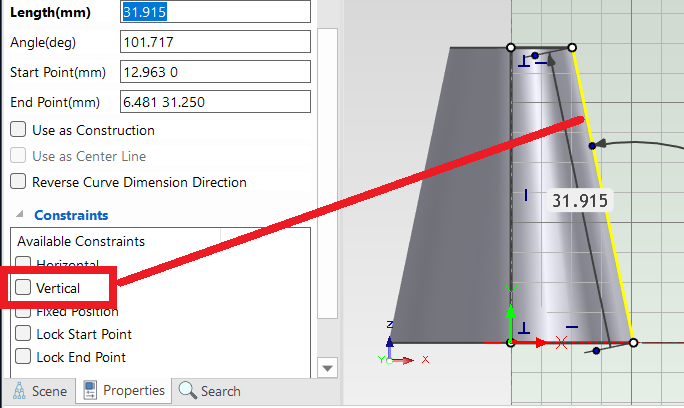
[4] Select the outer diagonal line and check [Vertical].
Then click [Finish] of the cross-section.
Then click [Finish] of the cross-section.

Since a " Cosmetic thread" cannot be created directly, the shape must first be converted into a cylindrical form.
[5] Click [Cosmetic Thread] in the [Annotation] tab.
[6] Select start edge from model. Set properties of thread.
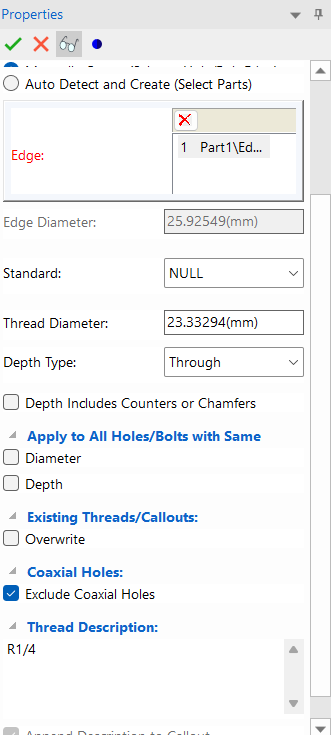
[7] Click [OK].
[8] Edit cross-section of Part Cone again.
Uncheck [Vertical] of outer line, then edit the line to be tapered.
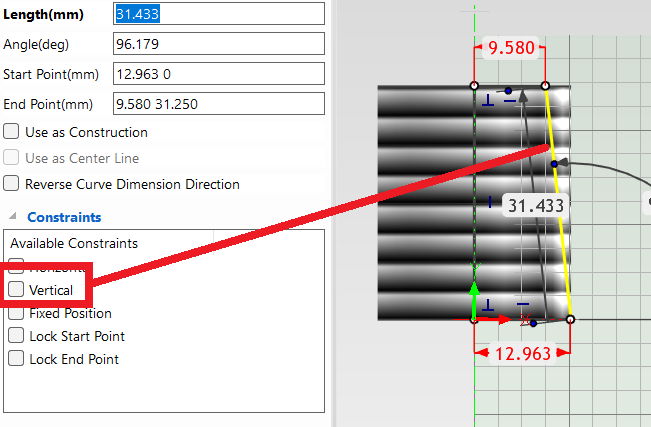
[9] Click [Finish].
Please refer to the video below.
Uncheck [Vertical] of outer line, then edit the line to be tapered.
[9] Click [Finish].
Please refer to the video below.
IC-072
Related Articles
Create a tap size that is not in IRONCAD's default settings
This section explains how to create new thread size that is not included in IRONCAD's default settings using the [Cosmetic Thread]. Tapered holes cannot be created using this method. The configuration file for [Cosmetic Thread] is stored in the ...Create tapered screws with pie holes and schematic screw mountains
This section explains how to create a tapered internal thread. IRONCAD is a CAD system that allows efficient modeling by utilizing items from the standard catalog. Tapered internal threads can also be easily created by using [Cut Pie] from the ...Set Insert Joint Point and create continuous pipes and mounts
This section explains how to use the [Attachment Point] function to build continuous pipe structures or equipment base frames in IRONCAD. In piping design and equipment base structures, it is common to use multiple sections of the same type of round ...Hide the Thread Runout
When projecting threaded holes in CAXA Draft, thread relief may be displayed depending on the settings. This section explains how to hide the thread runout. Procedure: [1] Select the projection view, then right-click and choose [3D view edit] → [View ...Create a twisted shape
This section explains how to create a twisted shape using [Loft] in the [Feature] tab. Procedure: [1] Create Sketch. then copy at the "TriBall". And set position each sketch. [2] Click [Loft] in the [Feature] tab. [3] Select all sketches. [4] Click ...