Edit Section Hatching
This section explains how to edit hatchings after projecting a drawing and creating a section view in CAXA Draft.
Procedure:
[1] Go to the [3D Interface] tab, then click [Edit Hatch].
[2] The Hatching lines of Section views. ※ Lines are possible to select with the multiple views.
[3] Right-click with the mouse (or press the [Enter] key) to confirm the selection. The editing dialog will appear.
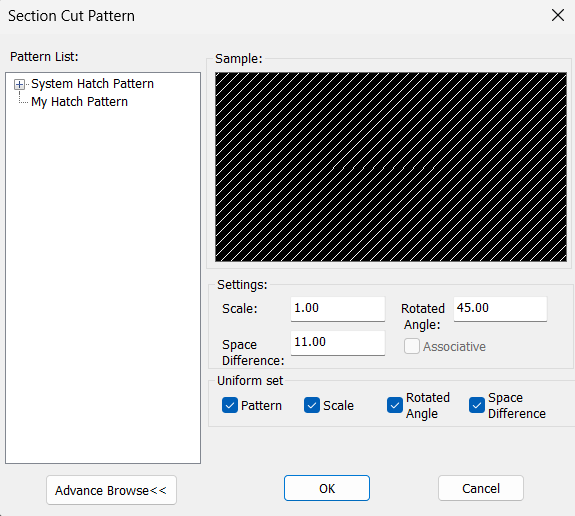
[4] Adjust settings such as the scale, then click [OK] to apply the changes.
Please refer to the video below.
CA-018
Related Articles
Create Hatching in a Projected View
This section explains how to create manual Hatching in a projected view that is linked to a 3D drawing, independent of Section View. Procedure: [1] Right-click on the projected view and select [View Edit] or [View Edit In-place] to enter the ...Edit Hatching
This section explains how to edit hatch patterns created in CAXA Draft. Procedure: [1] Go to the [Drawing] tab and click [Hatch Edit]. [2] Modify the following properties: Pattern List: Select any pattern Settings: Set Scale and angle Border; Add or ...Edit cross-sectional view hatching of data linked to 3D
This section explains how to edit the hatchings in a Section View that has been projected from 3D data in CAXA DRAFT. Procedure: [1] Go to the [3D Interface] tab, then click [Edit Hatch]. [2] Select the hatching you want to edit. If there are ...Create a hatch to a diagram projected from 3D
This section explains how to apply custom hatching patterns to each part in a projected view created from 3D data in CAXA Draft. Procedure: [1] Click [Standard View], then move [Options] tab. Set the [Hatch Settings] for each part or assembly. After ...3D file linked to the projection map(.Check/change the ics.
This section explains how to check or change the 3D file (.ics) that is linked to a projected drawing in CAXA Draft. Checking the Linked File [1] Open the drawing file (.exb) in CAXA Draft. [2] Click [Edit Links] in the [3D Interface] tab. [3] The ...