Create an automatic list
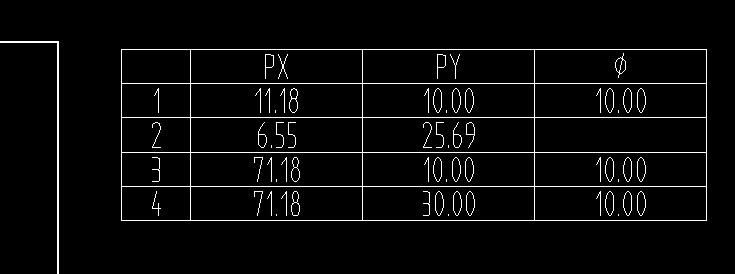
This section explains how to create an [Auto list] as shown in the figure below, using CAXA Draft.
Procedure:
[1] Click [Create User Coordinate] in the [View] tab.
Then you create coordinate system.
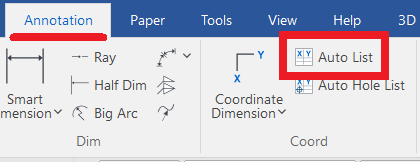
[2] Click [Auto List] in the [Annotation] tab.
[3] Select holes and so on.
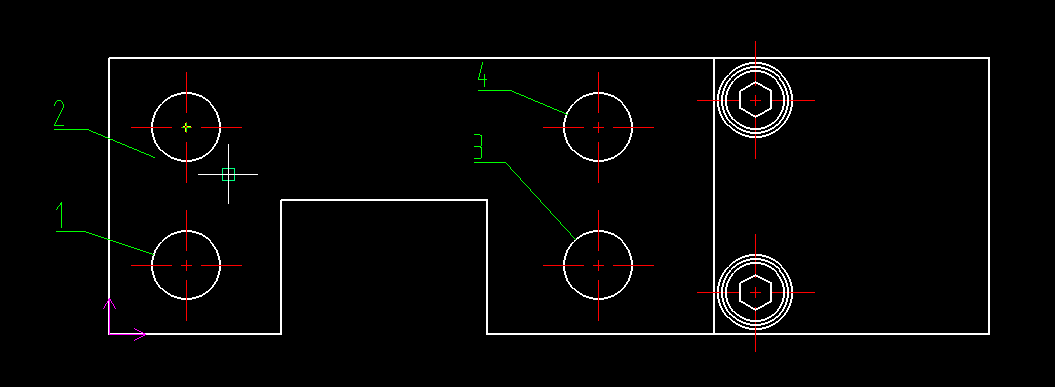
[4] Right-click and position list.
Please refer to the video below.
CA-044
Related Articles
Create an [Auto Hole List]
This section explains how to generate a table listing the X and Y coordinates of holes measured from a reference point. Procedure: [1] Go to the [Annotations] tab → [Coord] group → click [Auto Hole List]. [2] Pick a line as X and Y axis from view. ...Set Insert Joint Point and create continuous pipes and mounts
This section explains how to use the [Attachment Point] function to build continuous pipe structures or equipment base frames in IRONCAD. In piping design and equipment base structures, it is common to use multiple sections of the same type of round ...Creating a Block (CAXA Draft)
This section explains how to create Block parts in CAXA Draft. Block parts allow you to register frequently used lines or shapes as blocks so that they can be easily inserted into drawings. By registering items such as bolts, pins, and annotations as ...Create Dimensions on an Isometric View
This section explains how to create dimensions on an isometric view exported from a 3D scene. If the Isometric View Has Not Yet Been Created In the following steps, make settings and create dimensions: [1] Open CAXA Draft, then go to [Menu] → ...Create a part number (balloon) in a 2D diagram
This section explains how to create item numbers in CAXA Draft what infomation gotted from 3D data. To create part numbers based on 3D information, you must first perform [Import 3D Parts List]. 3D and linked - IRONCAD User's Guide Use [Create Item ...