Set the part list into multiple columns
This section explains how to split a parts list in a 2D draft (CAXA Draft) into multiple units.
Procedure:
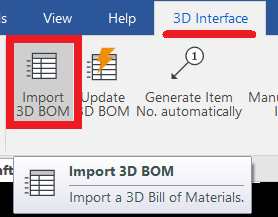
[1] Click [Import 3D BOM] in the [3D Interface] tab.
[2] Go to the [Paper] tab, then click [Break].
[3] In the instance menu under item 1, select [Break Left].
[4] Move the cursor closer to the part list and select the item you want to display at the beginning of the second column.
↓

When Adjusting the Rows to Be Moved
In the instance menu under item 1, select [Break Right], and select a row from the split parts list to revert it back to the original list.
In the instance menu under item 1, select [Set break point] to move the part of the parts list that was moved with [Break Left].
When selecting a parts list, the base point will be displayed in blue. You can also move it by selecting and dragging the base point.
Please refer to the video below.
CA-025
Related Articles
Multiple parts into one part (Boolean - Union)
Explain how to make multiple parts into one part. Procedures: [1] Click [Boolean] on the [Feature] tab. [2] Select [Union] from the [Properties]. [3] Select multiple parts to change one part with left mouse click. The selected parts are added to the ...Grouping part numbers (balloons)
Item numbers (balloons) can be grouped. Procedures: [1] Create a item number with [Manual Generate item No.] on the [3D Interface] tab. [2] Select the Item Numbers you want to group on the BOM list. [3] Click on the item number created in [1] to ...Show file attribute items in the file list
Explain how to display the file attribute information given to the file in the column of the file list. Items that are not in the default file list can be displayed. File attribute information is by entering the information you want to give to the ...Change the Frame Type of Part Numbers
This section explains how to change the shape of part numbers. Part number shapes are configured in the Bill of Materials (BOM) input screen. Procedure: [1] After projecting the drawing, click [Import 3D BOM] in the [3D Interface] tab. Since part ...Set Parts as Active
When setting a part as active means currently modeled part only editable. This prevents accidental modifications to other parts. How to: Select the part you want to activate, then right-click and choose [Set as active] from the context menu. The name ...