Project each part.
In the [Export Standard View] dialog of CAXA DRAFT, you can select parts or assemblies and configure their visibility in the [Assembly Settings] tab.
Procedure:
[1] Click [Standard View].
[2] Select [Assembly Settings].
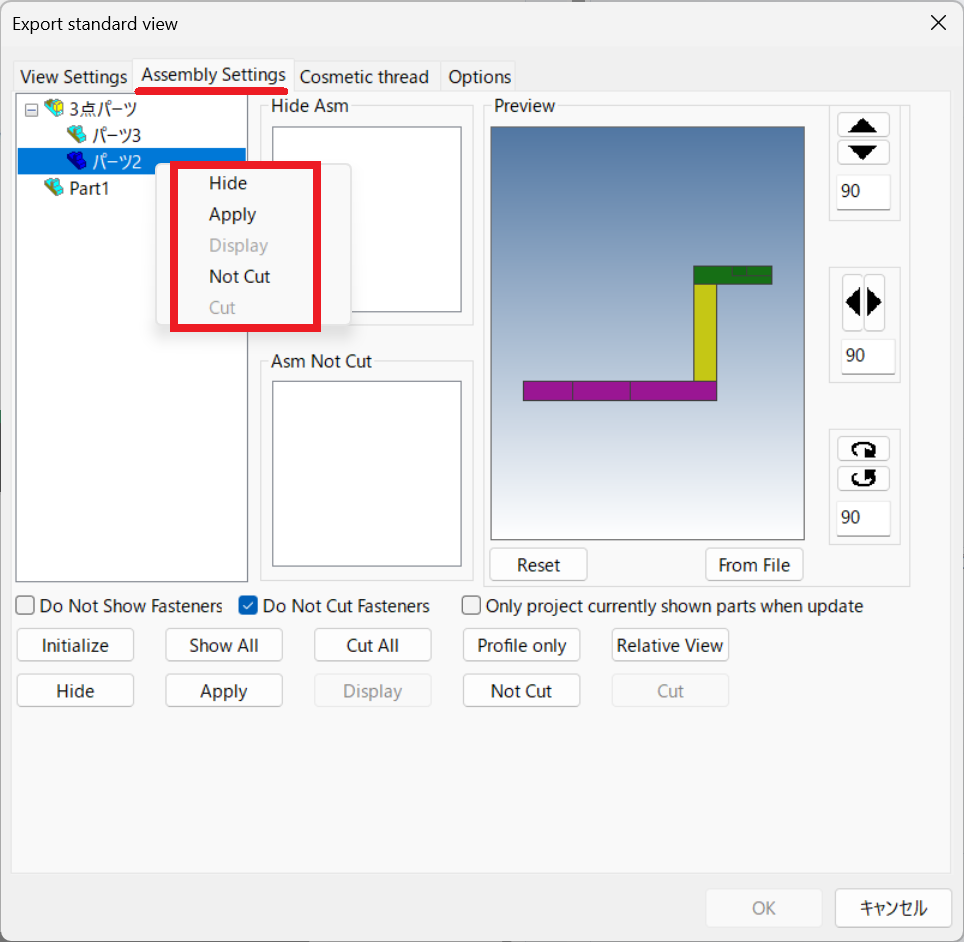
[3] Right-click on an element from the tree and you can set it to Hide to prevent it from being projected.
Please refer to the video below.
CA-039
Related Articles
Change the Frame Type of Part Numbers
This section explains how to change the shape of part numbers. Part number shapes are configured in the Bill of Materials (BOM) input screen. Procedure: [1] After projecting the drawing, click [Import 3D BOM] in the [3D Interface] tab. Since part ...Project the key groove in front
This section explains how to project with the keyway facing forward. Use the "Direct View" command to set the keyway to face forward, and then enable [Orientation of 3D Scene] in the [Projection Drawing Output] screen of CAXA Draft. This will allow ...Project 3D models into CAXA Draft in disassembly
This section explains how to switch between assembled and exploded views when projecting to CAXA Draft. To project an exploded view, first create a [Configurations] of the exploded state in the 3D model. Reference: Display Configuration is reflected ...Multiple parts into one part (Boolean - Union)
Explain how to make multiple parts into one part. Procedures: [1] Click [Boolean] on the [Feature] tab. [2] Select [Union] from the [Properties]. [3] Select multiple parts to change one part with left mouse click. The selected parts are added to the ...Creating a Sheet Metal Part from a Solid Part (Hopper Example)
This section explains how to create a hopper-shaped sheet metal part from a solid part. Procedure: [1] Create the base shape of the hopper using a solid model. Do not include any fillets in the solid geometry. [2] Go to the [Sheet Metal] tab and ...